I have seen lots of top ten lists for 2010 in the blogs that I follow, so I decided to look back at some of the things I have done. In looking back I was suprised to find that I started my blog way back in March 2010, I can't believe that it has almost been a year! Though I have been blogging since March, I have only posted 56 entries. One of my resolutions for the New Year is to really challenge myself to keep working on my blog. Without further adieu, here is my top ten for 2010:
One of my very first posts showed you how I added crown moulding to a basic builder mirror to dress up my dresser.
I also made a curtain panel for my daughter's room using a clearance curtain panel and some leftover colorful ribbons.
One of my favorite projects this year was the simple update of our kitchen from obnoxiously country to a more subtle country style.
Another project that I was glad to have finished this past year was the replacement of carpet in our dining room with beautiful new laminate wood floors.
I made my own "Elf on the Shelf" with the help of Andi's tutorial from Jane of all Crafts.
I made my own cheap wall art here.
I saw these pumpkin topiaries all over the blogs last year and decided to create my own here.
I had lots of comments on my use of a crib rail as a Christmas card display.
I recently blogged about some gift bags that I made out of a Christmas themed vinyl shower curtain I've had for years and never used.
My top viewed and most commented on post this past year was the slipcover that I made for a chair in my son's room. I used a tutorial from Beckie at Infarrantly Creative as my inspiration to finally tackle this project.
I have lots of plans for the house in the new year, so there should be no shortage of posts in 2011. Right now I am motivated to clean up house and plan to follow A Bowl Full of Lemons on her challenge to get organized this month.
Happy New Year!

Friday, December 31, 2010
Tuesday, December 28, 2010
Procrasti- santa and some elves
Approximately 12 years ago (yes you read that right, more than a decade ago) I bought this pattern from Simplicity:

I made 2 to give away and had a third one cut out and ready to be sewn together. At that point I lost all initiative to finish the last Santa. Several years later I moved the cut pieces from my mom's house to my first house with my husband and to every house we have owned since then. Recently, I decided that it was finally time to put the Santa together!

His eyes are blue beads, I used blush for his rosy cheeks and I drew in the eyelashes with a scrapbooking marker.

He turned out absolutely adorable and I love him! I ran out of fur after trimming the sleeves and hat. Fortunately, I was going to visit my mom and she just happened to have some in her stash. Here he is again after finishing off his coat with the fur trim:

I'm so mad that I did not finish this project sooner!
Soon after finishing the Santa, I saw a tutorial for an Elf on the Shelf by Andi at Jane of All Crafts(isn't that just the best name for a crafty blog? I love it!). I was first introduced to the Elf on the Shelf 3 years ago. It is a little doll that Santa sends to be his eyes and ears to make sure that little boys and girls are nice. I really wanted one, but was not willing to pay the $30 to buy the little elf and accompanying book. I was having so much fun with my sewing machine, that I decided to try the Elf as well. I purchased some felt and took some scraps of red and green fabrics from my mom's stash and went to work using Andi's tutorial. Within a few hours I had an adorable little elf (much cuter than the plastic headed elf in the kit, if I do say so myself). I then made enough elves to give one to each of my family members with kids.

Again, I drew the faces on the elves with my scrapbooking markers.

Here the elves are playing around with Santa.

My family is getting together to celebrate Christmas the second week of January and I can't wait to give these adorable elves to my even more adorable nieces and nephews! Thanks Andi for the awesome tutorial!
Monday, December 27, 2010
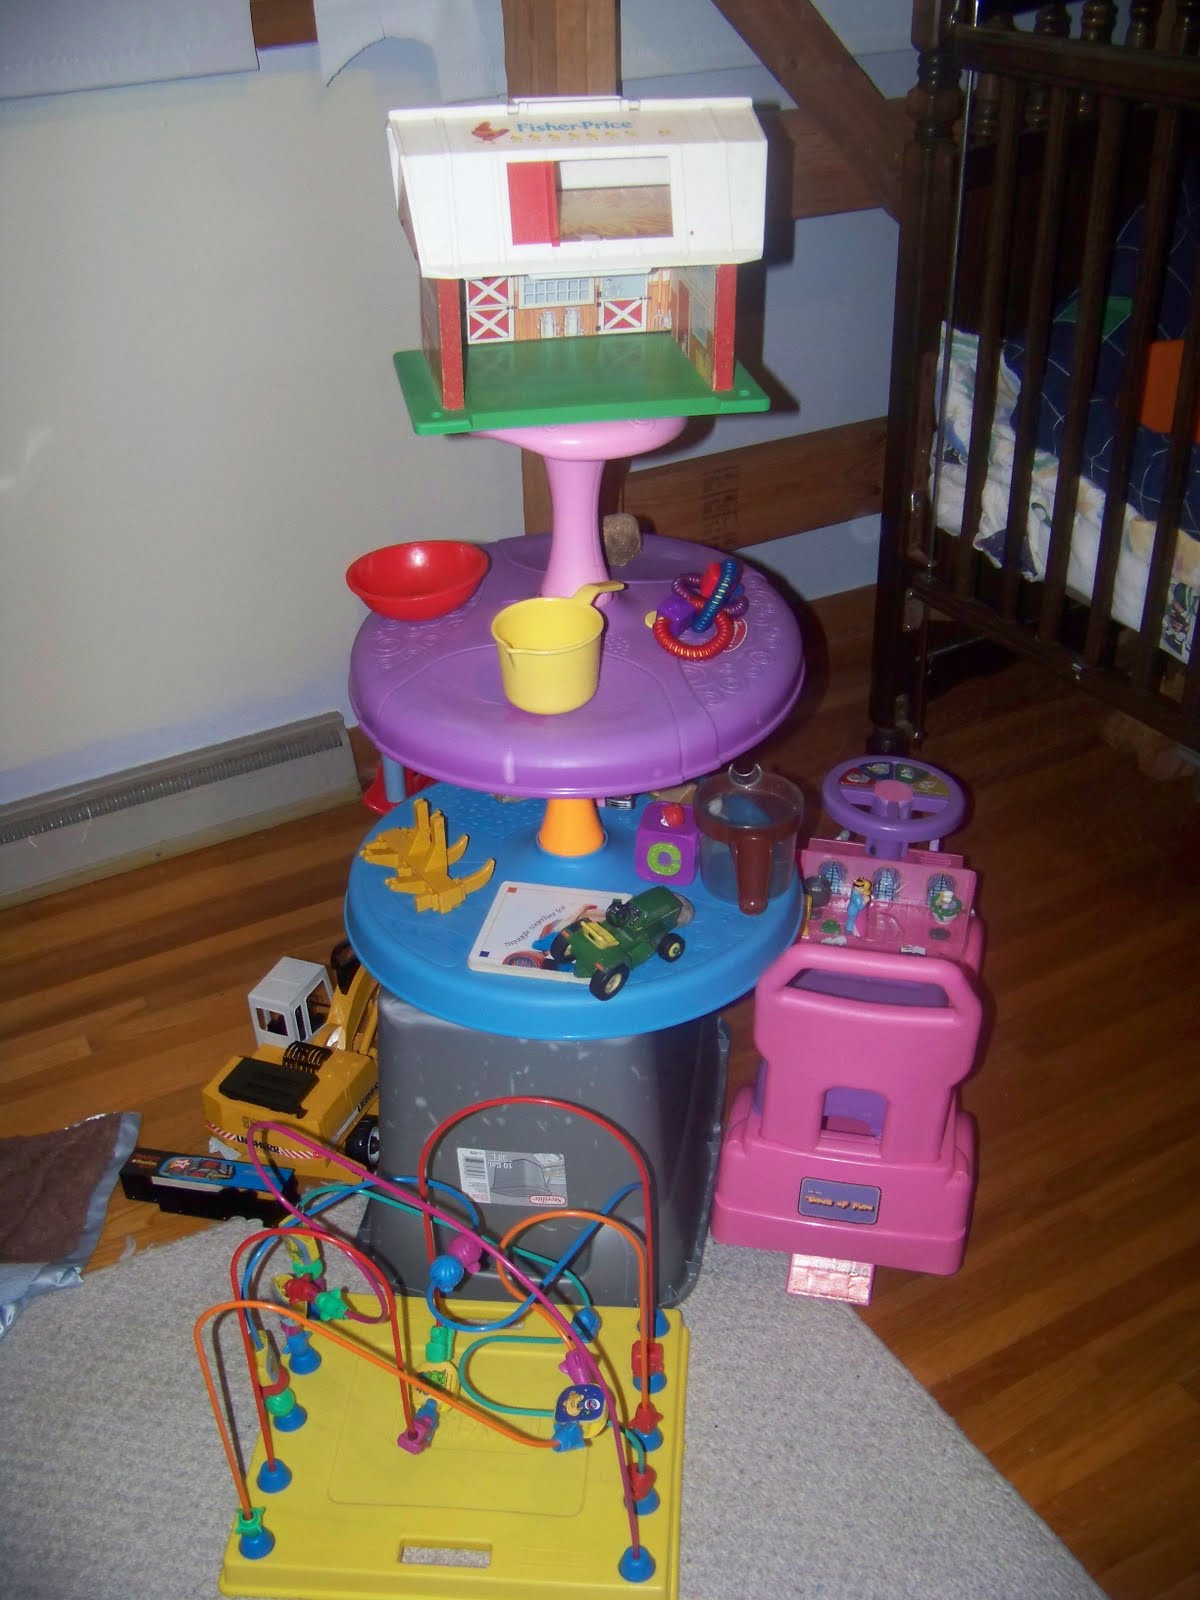
Toy Tree

My daughter created this "Christmas tree" out of toys at her grammy's house. I think that she may have a future as a decorator, what do you think? My personal favorite is the barn as a tree topper! I also love that it spins so that you can see all sides. Here is a closer view:
Sunday, December 19, 2010
Christmas House Tour


Welcome! Come in!

The entry~

I just hung some red and gold ornaments from our light fixture with some red ribbon to bring a little sparkle into the room.

I change the ribbon out in this wreath to go with the holiday or season. You can see my fall wreath and 4th of July wreath.
The living room~

My nativity set from the Dollar Store.

A quilt that my mom made me for Christmas a year or two ago. It actually hangs here all year round (I gave her the hint that I would love to receive another quilt that I could display here the rest of the year).

Living room mantle where we hang our stockings. I need another stocking holder, which I plan to purchase at the end of the season this year.

Our tree, which you can read more about here.
The dining room~


A simple hurricane full of red and gold ornaments.

Our second mantel.

Buffet with card display. You can read more about my card display here.
The kitchen~


Trivet and cups that I bought at the Dollar Store several years ago.

Plate holder that I change according to the season also. My husband's grandmother gave me this one year for Christmas and I absolutely love it!
So there you have our Holiday home. It seems to take longer and longer each year to get everything out, but that won't stop me from adding a few things! I have a list of things that I am looking to buy at the end of the season or make myself for next year. I hope you enjoyed the tour!
Saturday, December 18, 2010
Real or Fake? That is the question.
When I was a child, we had a fake tree. I remember pulling the pieces of the tree out of the cardboard box and organizing them by size. As soon as the stand was put together, we would start putting the branches in and fluffing them out. After mom strung the lights, we would all start decorating. It seemed to take forever to decorate the tree by the time we reminisced about Christmas' past and the stories behind special ornaments.
When I met my husband 9 years ago, I was introduced to the tradition of Christmas tree hunting and having a real tree. From the first time I went to the tree farm with my husband and his family, I have been a "real" tree person.

It is so much fun to walk around looking at all of the different trees in search of the perfect one. This tradition has become even more fun since we started our own family. Here are the kids looking for our tree:


This year we decided on a fir. After picking the perfect one, we took a photo opp before cutting her down.

The kids got right in there to watch as daddy cut down the tree.


After carrying it out and loading it into my in-laws truck, we had time for a little snack.

The next night we set the tree up, and after stringing the lights, the kids set to work decorating it with our collection of ornaments.


We have lots of Hallmark type ornaments related to major events in our lives over the past 10 years (marriage, first home, expecting, and children's first Christmas'), we have a few handmade ornaments featuring the kids handprints, and several from our own childhoods. The kids were so excited to help out, I resisted the urge to move ornaments up the tree from the bottome two branches until after the kids went to bed. They also loved looking at all of the different ornaments. I explained the stories behind some of the ornaments to the kids and also told them stories about their first Christmas'. It was the best part of the Holidays this year! And here is our finished tree:

So what kind of tree do you prefer?
I am linking to Kim at Newlywoodwards DIY Blog Party all about traditions.
Monday, December 13, 2010
Christmas Card Display
So did you figure out what baby item I used to display the Christmas cards my family receives? Come on take a guess...

It is the rail to a baby crib. My mother had a whole crib in her garage when we cleaned it out about 4 years ago. As I was expecting, I decided to take it home and use it for our little one. When I went to put it together, we realized that there were a few pins and screws missing. Though we could have gotten replacement parts, we decided against using the crib in the end as it could have been recalled or even contained lead paint. Though the crib was unusable for it's intended purpose, I could not bear to throw it out, so I put it in the basement to store until I could find a use for it.
That year for Christmas I moved the crib out of the way to get to all of my boxes of decor. After getting everything out and decorating the house I placed the empty boxes and bins back in the basement and noticed the crib again. This time I thought, why not use the crib railing to display all of my Christmas cards from friends and family. I love receiving these cards in the mail and keep them on display until well after the holidays, but had never had a great way to display them besides setting them up on matels and table tops or taping them to the wall. I picked the crib rail up and took it straight upstairs. I set it on top of my buffet cabinet and knew that it was perfect. I immediately ran out to buy some clothes pins to attach the cards and voila, a perfect display for all of the beautiful cards and pictures we receive during the Holidays!


As simple as it is, this is one of my absolute favorite pieces of Holiday decor. I have actually thought about leaving it up throughout the year to display any cards, letters and pictures that we receive.
What is your favorite piece of decor, Holiday or otherwise? Is there an item in your home that you repurposed to give new life? I would love to hear about it!
I am linking to Kim at Newlywoodwards DIY Blog Party all about traditions
Sunday, December 12, 2010
Vinyl shower curtain gift bags
Wow! Has it really been 3 months since my last post? Time definitely got away from me, but hopefully this post will make up for some of that lost time.
Probably 2 years ago, my mom gave me a Christmas themed vinyl shower curtain that she got deeply discounted at Kohl's. It was clear with seasonal words printed all over in different fonts.


Now, let me just say that I love Christmas and all of the decorating that goes along with it, but I think that people that include their bathrooms in the Christmas decorating are a bit obsessed. (No offense if you are one of those people!) So I kept the curtain in my Christmas stash and racked my brain for a creative way to use it. I thought that I could maybe attach it to the outside of the garage door or house, but that seemed pretty boring. Then I thought that I could use it as a tree skirt, but it just wasn't right. This year, I was about to break down and hang it up in my bathroom, when inspiration struck!
I work as a Special Education Aide in a junior high school. The school has a sewing club which meets quarterly to do a project outside of class. Recently they were making capri sun tote bags. Suddenly it struck me, if you can sew capri sun bags together, why not cut up and sew my vinyl curtain into gift bags! I pulled together all of my supplies:
1 vinyl shower curtain
cardboard templates
scissors
ribbon
hole punch
sewing machine
I grabbed a medium sized gift bag from my stash to use to make a template. Upon opening the shower curtain package I found that the cardboard insert inside was the exactly the same size as the front/back and bottom of my gift back, so I used that to make my template. The measurements for my pieces were as follows: bottom 8.5" x 4.5", sides 11" x 5" and front and back 11" x 8.5". I laid the cardboard templates on top of the curtain and cut.

The cut out pieces looked like this:

Next I took a front and side piece and placed them on top of each other front sides (or pretty sides) together. I did not use pins to hold the vinyl together as I did not want any extra holes in the vinyl that would weaken or rip open. I then stitched the 2 pieces together on my sewing machine using a 1/4" seam.


I continued this way attaching the back and the other side, until I had a bottomless box. I then matched the front or pretty sides of the bottom piece to the front (one of the long sides) and stitched them together with a 1/4" seam. After stitching the entire bottom on I turned the bag right side out. I rolled the top unfinished edge down 1/4" and then turned rolled it down a second time and stitched the edge to finish it off. The vinyl was bunching up and difficult to keep straight for this part, but I'm sure you could glue some trim around the edge to cover up any imperfections. Finally, I punched 4 holes into the bag, 2 on each side. I then threaded the ribbon through the holes to make a handle and knotted it on the inside of the bag. I also placed a piece of cardboard in the bottom of the bag to give it some stability.

I had cut out enough to make about 12 bags of this size from this curtain. I am so excited to give our friends and neighbors gifts in these bags and watch their expressions as I reveal to them that I made them out of an ordinary shower curtain! Have you found a creative use for an ordinary piece of holiday decor or used something ordinary from your home to decorate for the holidays? I would love to hear about. I have another unusual piece of holiday decor that I am excited to share with you soon. Hint: It is a baby item that I use it to display holiday cards we receive from friends and family.
I'm linking up with Allison from House of Hepworths for her party, you can check her out here.
Squeal! I was featured on House of Hepworths for this post! I am so honored and feel like a true member of the blog world now!
Subscribe to:
Posts (Atom)