Thursday, June 30, 2011

A little bit of this, a little bit of that

Things sure have been busy in our neck of the woods, and they are not about to slow down, even after the 4th of July holiday weekend. In the past two weeks I have worked on several small projects between spending lots of time with my family. You might want to have a snack or something to drink, this could be a long one!

I put our summer to do list up on our chalkboard (like Andi's from Jane of all Crafts) so that we could keep track of all of the things that we want to do/have done this summer. Since I am able to stay home during the summer months I want to spend some quality time doing things with the kids that we usually don't have time/don't make time for. The items on our list are also great opportunities for learning about and exploring our surroundings. The John Deere Expo in Moline, IL was a huge hit with the kids! They spent about an hour climbing on and off of all of the tractors on display. It was the perfect activity for a rainy day because most of the tractor models are displayed indoors and it is completely free, unless you walk into the gift shop full of toy tractors and John Deere paraphernalia.

We also purchased a membership to and visited our local zoo for the first time.


The vinyl that I purchased for my living room photo wall was a complete fail. The vinyl did not stick well at all on our textured walls. I was able to save the quote by covering over it with mod podge. The decorative scrolls simply kept falling off of the wall even with the addition of mod podge. So I attached the vinyl to a paper shopping bag and cut it out using a craft knife. I then traced the shape onto the wall and hand painted the scrolls.


After fixing the vinyl in the living room, we did a little bit of relaxing by the pool.


We are so fortunate that my in-laws have a pool in their backyard. It is so convenient and nice to have a private quiet place to cool off and relax without fighting the crowds.

After a refreshing swim, I worked on updating our kitchen by giving several items a coat of glossy black spray paint. We received the spice rack, knife block, cup holder, paper towel holder and utensil container for our wedding almost a decade ago.


I was tired of the wood tones and decided to paint them all black.


Did you see all of those little white plastic squares on my kitchen countertops? No they are not the latest kitchen design trend, rather they are to try to control a little problem that we have in our house every summer: ANTS! No matter how obsessively I clean and try to keep the kids eating and drinking only at the table, we have had a problem with ants both of the years we have lived in this house. Our neighbor recommended a pest control company which I called and had do a fumigation. Unfortunately, the fumigation was not as effective as I would have hoped. They told me in advance that ants come in the house to find a dry enviroment, but it has not rained here in about 2 weeks. Do any of you have any ideas for getting rid of ants?

During the weekend of the 4th of July, we spent a lot of time on the good ol' muddy Mississppi. We have had about as many boats as we have had houses, but since purchasing our pontoon boat, we have spent even more time on the river and especially at the local beach.


Finally, I created button bracelets for my daughter and I, using buttons that I had on hand.

The buttons are simply sewn onto a piece of elastic. The possibilities for these are absolutely endless!

Whew! I am tired, but I just realized today that school supplies are filling the store shelves, which means that summer is coming to a close. I only have about 6 weeks left to enjoy being a stay at home mommy before going back to work for the school year. So there will be no rest for the weary and we will be hitting the to do list hard and creating lots of fun family memories!

Tuesday, June 28, 2011

Guest Blogging

HouseofHepworths
I am over at HOH today guest blogging while Allison and her family are taking a crazy long road trip! My husband and I about divorced after a family trip from Iowa to Florida with a 1 & 2 year old last year, so staycations are the way to go for us, at least a little while longer!

I am so thankful to Allison for allowing me to show off a few of my crafty undertakings. While I created my blog to chronicle all of the changes that we made to our current (and hopefully last) home, I have lots of interests and hobbies besides home decor. Some of these things, such as photography, beading and sewing make it onto my blog on occassion.

I hope that you will take some time to check out Allison's wonderful blog while you are there! Thanks for taking the time to stop by!

Wednesday, June 22, 2011

Rainy Day Project- Edible Playdough

Do your kids love playdough? Do they also love to eat it? Maybe that is just my kids then! Guess that doesn't say much about my cooking!
Well, with black clouds covering the sky this morning, I knew that it would be a perfect day for playing inside with playdough. What could be better than playing with playdough? How about making your own and having it be edible?

All you need for edible playdough is peanut butter, honey, powdered milk and cocoa. My recipe, which I stole from my mom (we used to make it as kids), did not have any measurements, so please bear with my guesstimates. I put about 1 cup of peanut butter in a large bowl. Then added 1 teaspoon of honey. Finally, stir in small amounts of powdered milk until the peanut butter becomes doughy and less sticky. You can add cocoa to taste for a chocolate flavor, but I did not find this step necessary as the kids enjoyed the peanut butter taste.

Then get out some placemats and utensils and start creating!


The playdough was still a but sticky and stuck to the kids hands! Even better for licking and tasting that yummy peanut butter dough I say!

When we were finished, I put the leftovers in the refrigerator. Because the kids are playing with it with their hands, I would not keep it for more than a day or two. I also would not use it with the tools and accessories that they use with their real playdough!
Hopefully, I have not further confused my kids (or anyone elses') as far as not eating playdough and not playing with your food! Enjoy your next rainy day!

Tuesday, June 21, 2011

Holy mustard walls batman!

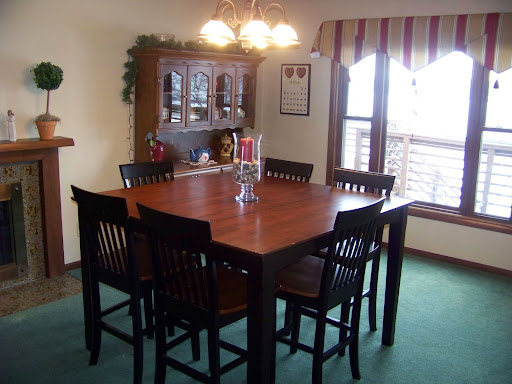
Our dining room was a neutral khaki/tan color when we moved in and was not high on my priority list for paint. That hunter green carpet though, that was one of the first things on my to-do list. Can you blame me?

I found some valances on clearance at JCPenney before we moved in that I thought looked very Tuscan/Italian with red, green and gold stripes. The fruit themed decor that I had accumulated over the years also fit the Tuscan/Italian theme with the rich jewel tones.

I had planned on painting the room a golden yellow like that found in my valances and dining room decor. Well, on a recent trip to WalMart, I found a gallon of oops paint in a beautiful mustard yellow that I thought would be perfect for the dining room. I wasn't sure what my husband would think, so I left it and a quart of 1/2 price chalkboard paint behind. A few days later, I could not get the paint out of my mind and returned to the store. I was so excited to see that the mustard paint was still there, but alas, somebody had snatched up the chalkboard paint. My husband was not digging the mustard color, but I assured him that it would be fine. At $7.50 for the gallon, the worst thing that would happen would be that I would have to repaint the room if we didn't like it.
I finally got to painting the dining room the other night and the difference is incredible. The mustard color really accentuates the beautiful color of the wood trim, floors and furniture. It makes the room feel so cozy and warm.


Replacing the tile in the fireplace surround has also been on my to do list, but with the new paint it seems to blend so much better.

The paint does seem a bit bright and is kind of overwhelming on all four walls! I am thinking about doing a wash or a faux painting technique to give the walls more of a weathered look like the walls of a Tuscan villa. For now though, I am ecstatic to have banished another neutralized room for something that better fits our style!

Wednesday, June 15, 2011

Duct tape and diaper wipes wallet

While cleaning out my beach bag recently, I found an empty plastic diaper wipes case. I was about to throw it away when I thought that it could make a cute wallet!


I have been dying to find a use for the zebra print duct tape since Allison from House of Hepworths showed off the adorable storage containers she made for her daughters room.
I ran straight to my local WalMart and purchased a roll of the zebra print duct tape. First I cut out a piece of paper to cover up the Huggies label. Then I simply cut strips long enough to go across the case lengthwise and fold under the edge, overlapping them slightly. When finished with the outside, I used some black electrical tape on the inside to cover up the uneven edges of the zebra tape. I also inserted a ribbon for a closure as the tape prevented the case from closing completely.


My 4 year old daughter saw the wallet and immediately wanted it for her own! My husband on the other hand, had this to say, "Congratulations, you are now the owner of a duct tape, diaper case wallet."


I think that it looks cute with my purse and therefore I like it!

I am linking this project to Hooking up with HOH.

Monday, June 13, 2011

How to throw a Little Mermaid party

Several weeks ago, I asked my daughter what kind of party she would like to have for her upcoming birthday. She responded, "A Little Mermaid party!" With that I began the planning invitations and decor with an under the sea theme. Invitations came first. I wanted something with a mermaid on it, I didn't care if it was Ariel, it just had to be a mermaid. As I suspected, I was unable to find anything in the stores except for invites with pictures of all of the Disney princesses. When I was unsuccessful at the store, I started searching online. I found a really cute one that a lady had made for her daughter by cutting and pasting her daughters face onto the body of a mermaid with fish and sea animals floating in the background. I searched for something that would be suitable to paste my daughters face on and couldn't find anything. Luckily, I was reminiscing and looking through old photos and happend upon one of my daughter sitting on the front of our boat in her swimsuit and sunglasses. I decided that I could just print the photo out onto cardstock and attach a paper mermaid tail.

When I finished the mock up of the first card, I showed it to my daughter. She squealed, "I have a mermaid tail! That's so funny!" I knew that it was perfect because she couldn't wait to deliver them to family members.
Once the invitations were finished, I moved onto decor. I was thinking simple seashells and sea animals created out of craft paper. While looking through a paper crafting book at work, I came across animals made using paper and toilet paper tubes. The book showed a crab and I decided to make an octopus and seahorse as well. I covered the toilet paper tubes in colored paper and then added claws and eyes for the crab, 8 legs for the octopus and a cutout seahorse. I then attached a string and hung them from the light fixtures with some green crepe paper for seaweed.


While coloring with the kids one night, I noticed several pages of fish and sea animals. I ripped the pages out, got some crayons and went to work (coloring has always been one of my favorite activities). Once they were taped to the closet door, I draped some green crepe paper seaweed in front of them.

Hello Mr. Crab!

I had several small fish, crabs and seahorses left and decided that I would tape them to the kitchen cabinets. I dug through my gift wrap and found some shiny blue tissue paper and cut it to fit the insets of my cabinets. Then I cut some seaweed out of 2 different colors of paper. Layering it all together really made the kitchen look festive!


With everything decorated, the final piece of the party was the cake. I researched online and finally saw an idea for a large rectangular base cake frosted in blue to represent water with a smaller circular cake frosted and covered in graham crackers to look like an island. We topped ours with a mermaid doll from the Dollar Store.

I wish that I would have added a palm tree or something, but it was pretty cute and most importantly, Reese loved it!
I had so much fun planning this party and putting everything together. I honestly can't wait for the next one, except that will mean that Reese will be yet another year older!

Tuesday, June 7, 2011

Landscaping and outdoor maintenance

After almost 2 years in our house, we are finally focusing some much needed attention on the outdoor spaces. We started by removing a very large bush from our front yard a few weeks ago. Almost 2 weeks ago, we finally picked up a truck load of river rock to fill in the raised bed we had made in it's place.

I think it still needs something, maybe a shepherds hook with some hanging flower baskets. I'm not sure, but it is definitely much better than before.
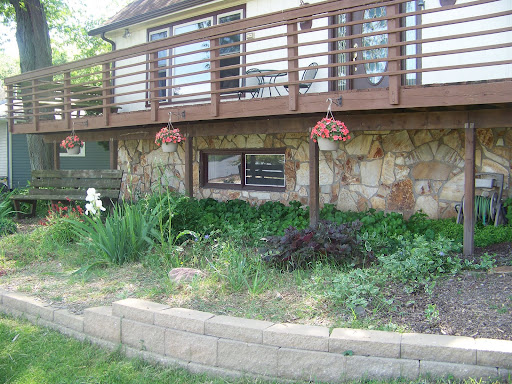
There was some rock leftover, which we put to good use in this planter under our deck. It was an eyesore with lots of weeds before. I weeded it really well, laid out some weed blocker and then covered it with the remaining rocks.

Unfortunately it was not enough to cover the smaller planter on top, but we plan to get more rock eventually for the rest of the planters along the front of the house and in the backyard. This one especially is due for a change, as it fills with grass and weeds and looks more like one of those "wildflower areas" along the highway than a cohesive garden you would see at somebody's house.

After spreading the rock, we moved onto the deck. We had several boards that were rotten. The kids had actually picked at one of the rotten boards all the way through so that one of their small feet could get stuck in the hole. We replaced 6 boards and then painted them with paint we had made to match.
I had started re-painting an exterior door last summer and the paint was so bad, I threw the can out without finishing the job. I put a fresh coat of our deck paint on the door and it turned out so well, I decided to do our front door as well. The wood skin of the door was peeling and flaking off, so I sanded it down to a smooth finish and then began painting. It took two coats, but the door looks so much more welcoming and inviting.
Randy's brother came over with his skid loader and removed the remainder of the dirt pile from the end of our driveway. Eventually when we fix the broken concrete in our driveway, we plan to pour concrete in that area as well as more of a parking pad.
Finally, we picked up more sticks and weeds from the yard and had another bon-fire. We still have to trim back several branches from the trees around the house before we have the roofers and siders here in just a couple of weeks. We have noticed a new leak and also some discoloration in the ceiling, so it is definitely becoming more of a necessity.


I am also very excited to see how it all comes together! Keep posted for pictures of the transformation!

More vinyl wall decor

During a recent visit to Dubuque to see family, I stopped at Shopko for some bargain hunting. While there, I happened to find some vinyl wall decor on sale that was exactly what I was looking for to dress up my living room photo wall.

I think that it really helps to dress up this long wall and to connect the three separate photo groups.


I was a little uncertain of the quote, "Family, a journey to forever." At first, I thought that it sounded like family is a burden that you carry forever, and that was not what I envisioned. Soon, I came to think that having a family allows your family traditions and values to last forever by being passed on from generation to generation.

For $12 the package included 2 sets of the same vinyl, one large and one small. I still have the smaller set that I can use elsewhere in my home. I love the difference that this small addition made to my long boring wall, for around $6.