Friday, December 16, 2011

Christmas Questionnaire

I have seen this questionnaire on several blogs that I read and thought that it would be a fun way to ease into some blogging for the Holidays. Here goes:

1. Egg nog or hot chocolate? Hot chocolate for sure!

2. Does santa wrap presents or just sit them under the tree? Santa always wraps them. It doesn't feel like Christmas unless you are surrounded by tons of pieces of beautiful wrapping paper!

3. Colored lights on tree/house or white? I like white lights, especially icicle lights. I have several sets that I use on the front of our house.

4. Do you hang mistletoe? Never.

5. When do you put your decorations up? Soon after Thanksgiving. My mom always tells me that I need to wait until after my birthday, December 4th, but because we buy a real tree the weekend of Thanksgiving, we start before then.

6. What is your favorite holiday dish? My family is very non-traditional as far as food goes, so my favorite is my mom's homemade chicken noodle soup.

7. Favorite holiday memory as a child? I love that we each took turns opening gifts one by one. There were five kids, so some years, it took us hours to open everything, but it was really nice to be able to see everyone's reaction to each gift!

8. When and how did you learn the truth about santa? I think that I was in about 5th grade. My friends revealed the secret and my mom confirmed it. I was devastated but put on a happy face for my 4 younger siblings.


9. Do you open a gift on christmas eve? not usually.

10. How do you decorate your christmas tree? with red, green and gold ornaments. Lots of our ornaments are hand me downs from parents and grandparents from when my husband and I were younger. We also have several sentimental ornaments celebrating the timeline of our lives together, marriage, 1st house, moving, pregnancy and babies.

11. Snow! love it or dread it? I love it for Christmas! If it could snow Christmas eve and then melt and not return until the next year that would be just fine with me!

12. Can you ice skate? I have never tried, but would believe that I would not be any good as roller skating was a very dangerous sport for me!

13. Do you remember your favorite gift? I got a typewriter one year for Christmas and spent days in my room typing up my own stories and poems.

14. What's the most important thing about the holidays for you? Spending time with family! My husband and I are both the oldest children in our families and are very close to our parents and siblings. Luckily, my family waits to celebrate Christmas
until January, while we get together with Randy's family on Christmas eve and Christmas day. This way we are not rushed and get to really enjoy the time we have with each of our families.

15. What is your favorite holiday dessert? I love the candies that my family gets together every year to make including peanut butter and cocunut bon bons, peanut brittle, and cookies.

16. What is your favorite holiday tradition? It would have to be picking out and decorating our live tree. Since meeting my husband, I have taken part in their tradition of getting a real tree. We go the week or so after Thanksgiving to pick our tree and set it up soon after.


17. What tops your tree? A Fanciful Flights Angel. I collect Fanciful Flights sculptures and was so ecstatic to find the tree topper.

18. Which do you prefer: giving or receiving? Definitely giving! I have made a few handmade gifts over the years, and those are definitely fun to give!

19. Candy canes: yuck or yum? Rainbow candy canes are good, but I would rather waste the calories on something chocolate!

20. Favorite christmas show? The classics: Rudolph and Frosty the Snowman.


21. Saddest christmas song? Christmas Shoes, but I love it!


22. What is your favorite christmas song? Mariah Carey's "All I want for Christmas is You", Mannheim Steamroller and Feliz Navidad. I have a very ecclectic taste in Christmas music, but those are my favorites to sing along to! I'll listen to Holiday Music from Thanksgiving until well after Christmas, I can't get enough of it!

Monday, November 14, 2011

Safari themed baby shower


I have not done very much crafting lately because I did not have the energy for it and did not have any projects that I was very enthusiastic to start. After several weeks off, I had the itch to craft and I jumped at the opportunity to do the decorations for my sister-in-laws baby shower. They knew that they were having a boy and the nursery was decorated with a safari theme, so the theme for the shower was a no-brainer. I knew immediately that I wanted to make a baby shower wreath to welcome everyone upon their arrival. I purchased a wreath form and covered it in blue ballons, just like I did for my birthday ballon wreath. Once the wreath was completely covered, I wrapped it with a safari ribbon. I attached a letter "C" for the name they have chosen and placed a monkey cut out in the center. The best part about the wreath, is that they can hang it at their house to announce the arrival of their little bundle!

I also knew that I wanted to make a baby shower penant banner. I purchased a large book of animal print scrapbook papers at Michaels for 50% off, getting more than 100 sheets of paper for around $10, much cheaper than buying individual sheets of paper. I cut the penants out of coordinating colors and patterns, adding letters that I cut using my fiskars circle cutter and templates.
I happened to find a Noah's Ark die cut template pack at Dollar Store that included die cuts of a hippo, lion and giraffe. I used more of the scrapbook paper and cut out several of each animal to hang on the walls.


For the table centerpieces, I gathered all of the safari type stuffed animals in my house and paired them with safari printed bottles and children's dishes filled with M&M's. The bottles were little more than $1 apiece at WalMart. The bowls were $1 for 2 at WalMart and $1 apiece for a travel bowl with lid at Dollar Store. Again, these decorations served dual purpose, as I sent them home with the mother-to-be after the party.

Finally, I prepared a game where the guests had to match the animal with the average length of gestation and printed it in a paper with an animal print border. I found the paper at WalMart and believe that it was $3 for about 25 sheets. The game was pretty difficult, which worked well for my family because they like to cheat! Seriously, my aunts are always causing a ruckus at our family events like this because they get overly involved in the game and trying to win. Yes, we are that family! They actually egged my niece on to give Ashley a hug so that they could measure how far her arms went around to cut their string for the belly band game!
My sister in law got lots of wonderful gifts! My favorite was this handmade piggy bank that featured a dinosaur and baby's name painted on the side. It was so cute!

My proud brother showed up at the end to thank everyone and to help load up all of the goodies! I can't wait to meet their little guy!

Sunday, November 6, 2011

Secret Revealed

I have been keeping a little secret!

We are expecting our third child in June 2012!

When we were pregnant with our first child, we also happened to be moving to my homeotwn and looking for houses. My mom and sister were going to open houses with us one Sunday and I told them, "We better find something soon because we will only have 9 months to get it ready." It was only a minute before it clicked and they both started screaming and crying!
When we were pregnant the second time, our oldest got in on revealing the secret. I happened to find a big sister shirt at a garage sale that was the perfect size. She wore it the next time we went to visit our parents, who were ecstatic at the news.
This past summer, while reading a blog, I came upon this idea for a skeleton t-shirt with a fetus to reveal a pregnancy and thought that it would fun. I bookmarked it and hoped that it would work in our time frame to reveal the pregnancy we were planning.
I was ecstatic when I found out in early October that I was indeed pregnant and immediately got to work on my own version of the shirt for upcoming Halloween festivities. Unfortunately, I do not own a silhouette machine, but I was not about to let that stop me. I found an image of a rib cage online and blew it up on my printer. I then cut out the image and traced it onto some scrap fabric. I did the same with an image of a fetus. I then cut out both images and placed them on a black shirt I rarely wore. After getting the placement just right, I pinned them in place and sewed them in place.
I wore the shirt when I went to visit my family just before Halloween. My mom thought that it was absolutely adorable. My brothers needed an explanation of the shirt! Everybody was so taken by suprise and so happy for us.

I have been feeling pretty good for the most part. I feel very nauseous around mealtimes and have no appetite for anything other than very bland foods. I have also been very tired, no doubt due to having two very active children to run after. The other day after work, dinner, cleaning up and bath time, I lay in bed with the kids to watch a movie. My husband walked in and exclaimed, "What, are you tired?" He is so suprised to see me like this because I am generally up later at night and out of bed earlier than him in the morning. It is funny because he is always telling me that I need to find a hobby so that I am too busy to decorate and paint the house. I remind him that the house is my hobby. I told him last night that keeping me pregnant would be one good way to keep me from doing any projects on the house because I have been too wiped to clean, let alone take on any crafty projects!

I have been working on a few things though and can't wait to show you!

Thursday, September 22, 2011

Wood, glass and vinly pumpkins, Oh my!

I may be going a little overboard with the pumpkins for fall, but I can't help it! I recently updated my pumpkin topiary with a little bit of greenery from the Dollar Store and I absolutely love it!

Then I found this little wood napkin holder at Goodwill for only $2.38.

I had my ceramic pumpkin and a fall table runner on the table before I found this little guy and it was a pain to take them on and off the table every time we ate.
The napkin holder is perfect because it allows me some decoration on the table, but it is practical because I do not have to take a ton of stuff off of the table every time we use it!
Next up are my glass pumpkins, which I made last year and never showed off. I originally saw these in Family Fun magazine and followed the tutorial to make my own. When researching to find the original article, I happened upon this blog that gives a good tutorial using crepe paper instead of tissue paper.

Basically, you cut tissue paper into strips and then modge podge it to the outside of a glass jar. I had some random Ball jars, orange tissue paper and black construction paper on hand and whipped these up in about an hour. I love the glow they give off with a tea light!

The magazine article also pictured a Frankenstein using green tissue paper, but you could do so many different things, like candy corn, a witch, or even a ghost. So fun and cute! This would be a great project to get the kids involved in as well.
Finally, while cleaning out my mom's garage this past weekend, I happened to find some white dryer duct. My mom told me to toss it, but I walked past the trash can to my car. My family thought that I was nuts to want to keep it, but they knew that I would have something up my sleeve! I saw these adorable pumpkins that Allison at House of Hepworths made out of aluminum dryer duct and spray painted orange. The dryer duct that I had was white vinyl. I love the look of white pumpkins, so I decided to make one first and spray paint it later if I did not like the white. I decided to use materials that I had on hand, so I cut a toilet paper roll in half and rolled it up to make the stem. Then I tied some green gift ribbon around the stem and curled it using my scissors. Finally, I hot glued a leaf (leftover from my topiary project) to the top.


I had enough dryer duct to make 4 pumpkins, though one was kind of short and I burned my fingers trying to pull the two ends together. It was totally worth it! I love the look of the white pumpkins, but I especially love that this whole project cost me absolutely nothing!
I am linking this post to Allison's Hooking up with HOH party.
What fall decorations have you made lately? I would love to hear about them!

Thursday, September 15, 2011

Fall Topiary- A Revision

Last year I made a fall topiary using 3 different sized faux pumpkins and a clay pot. I cut out the stems on the larger bottom pumpkins, hot glued them on top of each other and set the topiary in a pot. It was just the kind of project that I love, quick and with immediate gratification. I loved it! The only problem was that my topiary did not fair well in the home I intended for it. From the time that I first saw the topiaries on another blog, I imagined 2 topiaries, 1 on either side of our front door. Unfortunately, our front door is not very well protected from the elements and the topiary that I made was constantly being blown over and I had to retrieve the pumpkins from rolling all around the front yard!
When I pulled the pumpkins out of the basement to use this year, I immediately glued them together using some liquid nails adhesive. Though the bond felt much stronger, I did not like how you could see the ring of glue around each layer.


I thought about tying some ribbon around each layer to disguise the glue and then I saw a topiary with large leaves layered between each of the pumpkins and a lightbulb went off. I ran to the Dollar Store and bought two different colored strands of leaves. Then I cut the leaves off at the stems and arranged them by color. Finally, I hot glued large leaves around the pumpkins and filled in with smaller leaves on top.


As much as I loved the simplicity of the first topiary, I love this one even more! I have found a home for it in our entryway where all of our guests can see and enjoy it when they come to visit.
I'm so glad that fall is finally here! I have most of my fall decor out, but have a few things that I am hoping to add this year. Stay tuned for a few different diy pumpkins.

Monday, September 12, 2011

More Architectural Art

Over the summer I worked on expanding my letter library for architectural art. I do plan on trying to sell some pieces as soon as I have a variety of letters to choose from. I found that the best way to build up my library was to make architectural art for friends and family members. This allows me to see how the pieces will look and also to practice on technique and see what my actual cost will be.
My mom requested one after I gave my sister the first one that I made in our family gift exchange last Christmas. It only took me nine months, but I finally finished one for her:

Next, I made one for my brother and sister-in-law who are celebrating their 1 year anniversary.

My mother-in-law requested one after I gifted one to my brother and sister-in-law for their recent wedding. I did not want to use the exact same letters, so I came up with a plan to use architectural letter photos from their favorite vacation spot, Pensacola, FL. While on vacation there in March I captured most of the letters that I needed, and filled in with photos of letters that I took near our home on the river:

Finally, Randy and I had a Couples Shower this past weekend. I knew that I wanted to make an architectural art piece for them because it is so unique and personal.

All of the recipients loved their personalized piece, but not as much as I enjoyed making and gifting them!

Tuesday, September 6, 2011

Curb Appeal

When we first looked at our house and contemplated purchasing it, I was very disappointed with the curb appeal. The house had very dated wood siding that was in good condition except for the dormer windows on the second story, which were rotted and moldy. The roof had been damaged by tree branches that rested on the roof. We also had leaks and water stains on the ceilings. Finally, there were multiple speakers and intercoms from a radio system that was no longer working.
View of front of the house:

View of back of the house:

The moldy dormer windows:

Deteriorating roof:

One of our neighbors recently tore down the house on his lot and completely rebuilt the home. The remaining neighbors all have well-kept and nicely landscaped homes, so our house definitely kind of stuck out like a sore thumb in the neighborhood. I had contemplated painting the house over the summer and even experimented with Sherwin Williams online tools to see how our house would look with a new paint job. Soon after showing my husband the pictures and explaining how I planned to attempt to paint the house over the summer, he suggested that we check into the cost of having the house roofed and sided. I guess maybe he was afraid of the means I would use to paint the two-story exterior of our home, as I usually just paint by climbing on one of our dining room chairs!

My husband had never been one to take on any major projects in any of our previous homes until we were ready to sell. So you can imagine my suprise when after only 18 months, my hubby suggested that we give the house a facelift! My immediate reaction was fear that he was ready to put the house on the market and move on! (That scenario did cross his mind at one point, since we still own the lot that we were originally going to build on.) This fear subsided as we began to do some research into our options for the project.

After meeting with several different companies we decided on Mainstream Home Improvement. We signed our contract and anxiously awaited the start of work on our home. Finally, July 13th, they began work on the roof. It was several days before we saw any changes as they had to remove the old roof and replace several sheets of plywood that were wet and rotten. They also found a gutter between the garage and an addition to the home which channeled water into the ceiling and caused a leak. They removed the gutter and replaced all of the damaged wood in this area. Two weeks later we had a brand new beautiful roof. They began work on the siding the very next week. Unfortunately it was several days again before we saw much of a change. They worked their way around the house doing all of the trim work and soffits before starting on the actual siding. I never imagined that there was so much work to be done to prep for the actual siding! They spent the first full week trimming all of the windows and putting in the soffits.
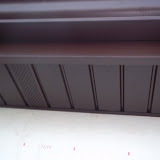
Soffits before:

Soffits after:

Finally they wrapped the whole house in Tyvek and began the actual siding. When I saw the first pieces go up I could not believe the difference! When the whole project was done, I just wandered around the exterior of the house admiring how beautifully it turned out!


Though we had discussed going with a darker color to create more contrast, we decided to stick with a light yellow very similiar to the color of the original wood siding. As a result of the color of the siding being very similiar to the original color the difference is very subtle at a distance. As a matter of fact, we actually had a person stop on the highway in front of our house to be able to take a better look soon after the job was finished.

Some side by side before and after shots so you can see the changes! The front door:

Garage side:

The roof and siding crews from Mainstream were so professional and helpful. They suggested things like new light fixtures to replace the rusted and bulky flood lights. Since they had to remove the old ones anyway, they said they could put up whatever we provided. They put tarps out all around the work areas so that all of the nails, screws and debris from their work was easily cleaned up at the end of the day. They also swept the yard and perimeter of the house for all metal and debris, which was very nice. The kids and I were outside playing every night after they had finished working and never had to worry about finding dangerous debris. On the last day of the project, they packed away their tools and did a quick sweep, leaving us to simply enjoy our home and not with a bunch of clean up.

One more before and after for ya!


And we have enjoyed it! We hosted a party at our house the weekend before Labor Day and were so proud to show off our beautiful home. We still have many more projects to do: landscaping, tree removal and repairing the driveway, but for now I am content to sit and take in the amazing changes that have occurred thus far.

I am linking to:
Thrifty Decor Chicks September Before and After Party
A Bowl Full of Lemons One Project at a Time

Disclaimer: I have not been compensated in any way by Mainstream Home Improvement for mentioning them on my blog.