Several weeks ago I painted our neutral dining room a bright and mustardy yellow. I loved how the color looked with all of the dark wood tones in the room. It also related well to the gold tones in the window treatment. But the rug seemed very out of place after such a bold color change.
Thankfully, my husband has always hated the rug and was on board with looking for another. While shopping this past weekend at Kohl's, I happened to notice that the rugs were 50% off. I looked through the rugs and one immediately grabbed my attention. I pulled it out and looked at it closer, then put it back on the shelf. I turned to leave and stopped to go back and put the rug in my cart. My mom had an extra 30% off coupon and I figured that I could always return it if my husband did not like it. So we checked out and I got my $100 area rug for just $35!
We got home late that night, so after putting the kids to bed, I opened the rug and immediately placed it under the table. I swear I heard birds singing, it was so lovely! Then I called my husband in to see what he thought of the new rug. His reaction was a little less dramatic: "Looks like a rug to me."
Though my husband was very reserved that night, he did comment the next morning that he did like it. I have to admit that it looked even better to me the next morning also!
Yes that is my son peeking out from the edge of the photo!
He's still there behind the table.
While my husband may not have been very excited, I think that the new rug gives the room a much richer feel. Isn't funny how one change brings about another and then another! What changes have you made lately?
Thursday, August 18, 2011
Friday, August 12, 2011
Monogrammed Door Mat
I finally threw away the door mat that we received as a wedding gift almost a decade ago. It was sun-faded and falling apart. Nasty! I did not know those things were so expensive until I tried to replace it. If you want something substantial and cute, it will cost you at least $25. I really liked the monogrammed ones at Bed, Bath and Beyond but was unwilling to spend the money.
I found a plain and inexpensive one at Walmart and decided to dress it up. I have seen lots of painted and spray painted rugs in blogland and decided to give it a try. I had a "W" magnet that I thought would be the perfect size for a monogram on the mat.
I taped off the area around the "W" and sprayed it with some gloss black spray paint. It took about 3 coats to get the coverage that I wanted, though I think that I would have used flat paint if I had had some on hand.
This quick project really helped to make our front door a little more welcoming.
Gone Fishing!
I have wanted to make this magnetic fishing game since I first saw it at Frugal Decor Mom way back in April. On a recent trip to JoAnn's I found three coordinating fabric remnants for less than $5 and knew that they would be perfect! A few days later, while at Walgreen's, I spied several sand buckets on clearance for $0.50 each. You bet your booty I snatched up every last one that they had!
Finding such great deals on the supplies that I needed was the push that I needed to get to work. I immediately looked up the original tutorial here, traced the fish shape off of my computer screen and got to work tracing and cutting. I whipped together about 25 fish and stuffed them. Then I got stuck. I did not have coordinating thread to close up the hole from turning and stuffing the fish. I tried white thread and it looked awful! Also, I needed washers for the magnet to stick to.
The kids were so excited to try out the game and I would not let them play with the fish because I could see fiberfill all over the house! I received the motivation that I needed to get them put together when the neighbor invited the kids and I over and showed them how to cast and reel a fishing pole. This may not seem like much of a motivator, but this activity kept the kids entertained for over an hour! I ran out and bought coordinating thread and begged some washers off Randy's grandpa- he has an abundance of them in his garage and was happy to donate to my project!
Once I had all of my supplies, I spent the kids naptimes stitching the fish closed and adding the washers to their noses. They are so cute!
I was able to make enough fish and acquire enough buckets that I plan to give one to each of my nephews as well!
My kids were so excited to finally be able to play with their fish! Unfortunately they prefer to run around in nothing but underwear while at home (which I am ok with because it saves on laundry!) so I was unable to take any pictures! I plan to give one to my nephew for his birthday this weekend, so hopefully I will get some pictures then!
I have really enjoyed using my sewing machine and have plans to make more fish once I find some more fabric. I would also like to make some like these with the math/counting manipulatives like Counting Coconuts did on her blog. What projects have you finished lately?
Labels:
kids activities,
projects,
sewing
Tuesday, August 9, 2011
Curb Appeal
When we first looked at our house and contemplated purchasing it, I was very disappointed with the curb appeal. The house had very dated wood siding that was in good condition except for the dormer windows on the second story, which were rotted and moldy. The roof had been damaged by tree branches that rested on the roof. We also had leaks and water stains on the ceilings. Finally, there were multiple speakers and intercoms from a radio system that was no longer working.
View of front of the house:
View of back of the house:
The moldy dormer windows:
Deteriorating roof:
One of our neighbors recently tore down the house on his lot and completely rebuilt the home. The remaining neighbors all have well-kept and nicely landscaped homes, so our house definitely kind of stuck out like a sore thumb in the neighborhood. I had contemplated painting the house over the summer and even experimented with Sherwin Williams online tools to see how our house would look with a new paint job. Soon after showing my husband the pictures and explaining how I planned to attempt to paint the house over the summer, he suggested that we check into the cost of having the house roofed and sided. I guess maybe he was afraid of the means I would use to paint the two-story exterior of our home, as I usually just paint by climbing on one of our dining room chairs!
My husband had never been one to take on any major projects in any of our previous homes until we were ready to sell. So you can imagine my suprise when after only 18 months, my hubby suggested that we give the house a facelift! My immediate reaction was fear that he was ready to put the house on the market and move on! (That scenario did cross his mind at one point, since we still own the lot that we were originally going to build on.) This fear subsided as we began to do some research into our options for the project.
After meeting with several different companies we decided on Mainstream Home Improvement. We signed our contract and anxiously awaited the start of work on our home. Finally, July 13th, they began work on the roof. It was several days before we saw any changes as they had to remove the old roof and replace several sheets of plywood that were wet and rotten. They also found a gutter between the garage and an addition to the home which channeled water into the ceiling and caused a leak. They removed the gutter and replaced all of the damaged wood in this area. Two weeks later we had a brand new beautiful roof. They began work on the siding the very next week. Unfortunately it was several days again before we saw much of a change. They worked their way around the house doing all of the trim work and soffits before starting on the actual siding. I never imagined that there was so much work to be done to prep for the actual siding! They spent the first full week trimming all of the windows and putting in the soffits.
Soffits before:
Soffits after:
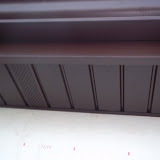
Finally they wrapped the whole house in Tyvek and began the actual siding. When I saw the first pieces go up I could not believe the difference! When the whole project was done, I just wandered around the exterior of the house admiring how beautifully it turned out!
Though we had discussed going with a darker color to create more contrast, we decided to stick with a light yellow very similiar to the color of the original wood siding. As a result of the color of the siding being very similiar to the original color the difference is very subtle at a distance. As a matter of fact, we actually had a person stop on the highway in front of our house to be able to take a better look soon after the job was finished.
Some side by side before and after shots so you can see the changes! The front door:
Garage side:
The roof and siding crews from Mainstream were so professional and helpful. They suggested things like new light fixtures to replace the rusted and bulky flood lights. Since they had to remove the old ones anyway, they said they could put up whatever we provided. They put tarps out all around the work areas so that all of the nails, screws and debris from their work was easily cleaned up at the end of the day. They also swept the yard and perimeter of the house for all metal and debris, which was very nice. The kids and I were outside playing every night after they had finished working and never had to worry about finding dangerous debris. On the last day of the project, they packed away their tools and did a quick sweep, leaving us to simply enjoy our home and not with a bunch of clean up.
One more before and after for ya!
And we have enjoyed it! We hosted a party at our house the weekend before Labor Day and were so proud to show off our beautiful home. We still have many more projects to do: landscaping, tree removal and repairing the driveway, but for now I am content to sit and take in the amazing changes that have occurred thus far.
I am linking to Thrifty Decor Chicks September Before and After Party.
Disclaimer: I have not been compensated in any way by Mainstream Home Improvement for mentioning them on my blog.
View of front of the house:
View of back of the house:
The moldy dormer windows:
Deteriorating roof:
One of our neighbors recently tore down the house on his lot and completely rebuilt the home. The remaining neighbors all have well-kept and nicely landscaped homes, so our house definitely kind of stuck out like a sore thumb in the neighborhood. I had contemplated painting the house over the summer and even experimented with Sherwin Williams online tools to see how our house would look with a new paint job. Soon after showing my husband the pictures and explaining how I planned to attempt to paint the house over the summer, he suggested that we check into the cost of having the house roofed and sided. I guess maybe he was afraid of the means I would use to paint the two-story exterior of our home, as I usually just paint by climbing on one of our dining room chairs!
My husband had never been one to take on any major projects in any of our previous homes until we were ready to sell. So you can imagine my suprise when after only 18 months, my hubby suggested that we give the house a facelift! My immediate reaction was fear that he was ready to put the house on the market and move on! (That scenario did cross his mind at one point, since we still own the lot that we were originally going to build on.) This fear subsided as we began to do some research into our options for the project.
After meeting with several different companies we decided on Mainstream Home Improvement. We signed our contract and anxiously awaited the start of work on our home. Finally, July 13th, they began work on the roof. It was several days before we saw any changes as they had to remove the old roof and replace several sheets of plywood that were wet and rotten. They also found a gutter between the garage and an addition to the home which channeled water into the ceiling and caused a leak. They removed the gutter and replaced all of the damaged wood in this area. Two weeks later we had a brand new beautiful roof. They began work on the siding the very next week. Unfortunately it was several days again before we saw much of a change. They worked their way around the house doing all of the trim work and soffits before starting on the actual siding. I never imagined that there was so much work to be done to prep for the actual siding! They spent the first full week trimming all of the windows and putting in the soffits.
Soffits before:
Soffits after:
Finally they wrapped the whole house in Tyvek and began the actual siding. When I saw the first pieces go up I could not believe the difference! When the whole project was done, I just wandered around the exterior of the house admiring how beautifully it turned out!
Though we had discussed going with a darker color to create more contrast, we decided to stick with a light yellow very similiar to the color of the original wood siding. As a result of the color of the siding being very similiar to the original color the difference is very subtle at a distance. As a matter of fact, we actually had a person stop on the highway in front of our house to be able to take a better look soon after the job was finished.
Some side by side before and after shots so you can see the changes! The front door:
Garage side:
The roof and siding crews from Mainstream were so professional and helpful. They suggested things like new light fixtures to replace the rusted and bulky flood lights. Since they had to remove the old ones anyway, they said they could put up whatever we provided. They put tarps out all around the work areas so that all of the nails, screws and debris from their work was easily cleaned up at the end of the day. They also swept the yard and perimeter of the house for all metal and debris, which was very nice. The kids and I were outside playing every night after they had finished working and never had to worry about finding dangerous debris. On the last day of the project, they packed away their tools and did a quick sweep, leaving us to simply enjoy our home and not with a bunch of clean up.
One more before and after for ya!
And we have enjoyed it! We hosted a party at our house the weekend before Labor Day and were so proud to show off our beautiful home. We still have many more projects to do: landscaping, tree removal and repairing the driveway, but for now I am content to sit and take in the amazing changes that have occurred thus far.
I am linking to Thrifty Decor Chicks September Before and After Party.
Disclaimer: I have not been compensated in any way by Mainstream Home Improvement for mentioning them on my blog.
Labels:
curb appeal,
house exterior,
roofing,
siding
Subscribe to:
Posts (Atom)